Saturday, March 23, 2013

How to easily core a strawberry

Hi! I'm here today to show you a quick and easy way to core a bunch of strawberries for slicing. (Please ignore the bad quality of the photos. It's not so easy to hold the strawberries in one hand and my iPhone in the other so several of pictures are blurry.)

Step 1.Wash your strawberries. ;)

Step 2. Insert a regular old drinking straw into the bottom of your strawberry.

Step 3. Push the straw straight through the strawberry and out the top.

Step 4. Admire the cool little hole in your strawberry and the perfect cylinder of strawberry core.

Step 5. Cut off the top and slice the strawberry however you chose.

Alternatively, you could pick off the leaves and then push the straw in from the top but that was an extra step and I had two containers of strawberries to get done in a short amount of time for a preschool Valentine's Day party so this way was faster. I hope this is helpful and that you all are having a great weekend.

Monday, March 18, 2013

St. Patrick's Day Shenanigans

Hi! Did you have a fun St. Patrick's Day? I have to admit, this is one of my favorite holidays. Not only do I really love shamrocks and the color Kelly Green but for one day out of the year, everyone is Irish :)

We walked in the local town parade with the preschool the weekend before St. Patrick's Day and even though it was really windy and chilly, the girls were super troopers!


It was a constant battle the whole parade trying to get E to keep her gloves on.


Here we are before the parade started. K wore a green, Kiss Me, I'm Irish t-shirt over her sweatshirt but no one could see it anyway since the girls were so bundled up.


The other big news was that on St. Patrick's Day a tricky little leprechaun made a treasure hunt for K.
This is Lucky the Leprechaun. He has the first clue
for the treasure hunt rolled up on top of his shoes.

Daddy read each clue to K and then she had to solve the riddle to find the next clue.

Some of the hiding spots were a bit tricky...

But K was able to outsmart that old leprechaun and find his hidden pot of gold.

And here she is giving Lucky a hug to thank him for sharing his gold with her.
I hope your St. Patrick's Day was fun, filled with a bit of shenanigans, and that you feel blessed in your life and not just lucky, even if you ARE Irish ;)

Sunday, March 17, 2013

Little E's 1st Birthday Party Recap, part 2

Today's post is a really fun one for me. While I absolutely love planning and decorating for parties, it's our babies that really make the event special. And Little E definitely did not disappoint!

For her birthday outfit E wore a bunny shirt complete with gold crown and furry feet, a gray tutu skirt with black leggings underneath, and for about 10 seconds, a big pair of pink bunny ears.


Sharing a cuddle with Great Grammie

Wearing the Birthday Princess hat. I couldn't even
get it tied on before she had ripped it off her head.

When K turned one she didn't like to be messy (which I will freely admit is my fault because I didn't like her to be messy so I wiped her face and hands a lot) and she didn't eat many sugary foods so her first birthday cupcake experience was a bit anti-climatic. Not so much with E. This little girl enjoyed every single bite of frosting!

Starting out slowly and not too messy...

That whole "hands" method is way too slow.

This is how I eat cake too.

I loved every second of how messy she got while eating her cake.
I'm so glad that I've relaxed when it comes to being clean vs having fun.

Big Sis giving her a smooch for a job well done.

Little E was also a champ at opening gifts. She really tore into the paper and was genuinely excited about each gift. Plus if there was even a slight doubt that she wouldn't be able to unwrap something, Big Sis was right there on the job. You can also see the Peeps bunny bunting I made to decorate her high chair. Each side originally had one more bunny and a bow on the end but E kept pulling them off so I cut them off to save my sanity.

Check out the totally adorable bunny shoes she's wearing!

It was a really fun party and I think everyone who was there truly enjoyed themselves. I know I did!


Thursday, March 14, 2013

Little E's 1st Birthday Party Recap, part 1

SomeBunny turned 1 back in January and we had a sweet bunny-themed party for our Little E.

Here are a few behind-the-scene photos of the decorating tips and tricks I used to make this birthday fun.

Invitations: As with most of the parties I throw for the girls, I made the invitations with some help from the internet. I found this great bunny stationery and was able to import it into Photoshop to make just a few minor adjustments. I added my own text to the invitation and simplified the front of the envelope. This was the first time I made envelopes and I was worried about how they would hold up in the mail, but all of the recipients said they arrived unscathed so that was great. I printed the envelopes double sided with a pink gingham print for the inside and the invitations had a brown gingham print on the backside. I love how they turned out and will definitely do this again for future invitations.
Front of the envelope. I used a silver Sharpie to write the addresses.

Inside of the envelope. I used a glue stick for the sides.

The invitation. The back was double sided with brown gingham.

Back of the envelope. I used double sided tape for the flap.

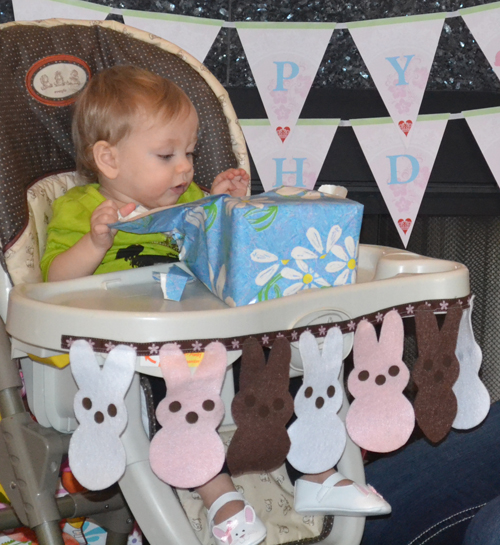
Decorations: I reused the birthday banner from K's Alice in Wonderland 4th birthday party. It has a white rabbit on the last flag of HAPPY so it was appropriate for the theme. I also had pink polka-dot balloons for the girls to play with at the party.

Table decorations: I ended up using plastic tablecloths for this party since I wanted pink and we don't have pink cloth ones. The pink plastic ones I found were too bright though so I also used plastic white lace tablecloths over the top of the pink ones to subdue the color and make it look a bit softer. Considering they were plastic I think they looked pretty good. For "centerpieces" I used two stuffed bunny toys per table. K has *lots* of stuffed bunnies so it wasn't hard to find the 6 that I needed.

The main part of the centerpiece were these edible bunny pops. I found the idea on Positively Splendid and love how they turned out. The large zig zag pot is a steal at $1.99 from The Container Store and I love how it looks like an over-sized cupcake liner. I stuffed a green floral ball inside and covered the top with Spanish Moss to make it look like the bunnies are frolicking in the summer lawn.

The great part about these bunny pops is they are made out of readily available store-bought items. The pop itself is a mini powdered sugar doughnut, the ears are flat marshmallows, the tail is a mini marshmallow and the nose is a pink jellybean. It's all held together with melted white chocolate "glue". However, a word of caution if you make these. While they are super easy to make, we found out the hard way that we should have inserted the ears BEFORE "gluing" on the nose and tail. We had to re-attach 90% of the noses & tails because pushing the toothpicks in after they were attached caused most of them to fall off.
The funniest part about these little cuties is that no one realized they
were supposed to eat them and we ended up with 20+ pops left over.

Party favors: As with all of the parties I host, I had been collecting bunny-themed toys for years before the actual party. Yes, that means I had been collecting party supplies for the birthday of child that hadn't even been born yet. I know, it's a sickness. Each girl received a stuffed dutch rabbit that bears a striking resemblance to a super cute real bunny I know (woot Sid!), a pair of bunny ears, a set of pink pom poms and the super cute pink bunny party favor bag from Mr. Printables was filled with Annie's Homegrown Bunny Grahams Friends and Bunny Fruit Snacks.

The rest of the party favors included a bunny mask craft, bunny socks, a bunny shaped straw and note pad, and some happy mushroom erasers.

We served sandwiches, fruit, vegetables, macaroni and cheese, and of course, carrot cake for dessert. I also made these milk bottles that were a pretty big hit.

Stay tuned for part 2 to see the rest of the party and the beautiful birthday girl herself :)