
The whole theme of this party began several years ago when Toys R Us was discontinuing their line of Ugly Dolls. They had several of the small clip-on dolls left that were cute so I picked up four with the hopes that at some point I could convince one of the girls to have a monster party.
The tricky thing about this party is that we had been out of town for several days leading up to it so I didn't have the usual amount of time to get ready for it. The vacation was worth it though! :)
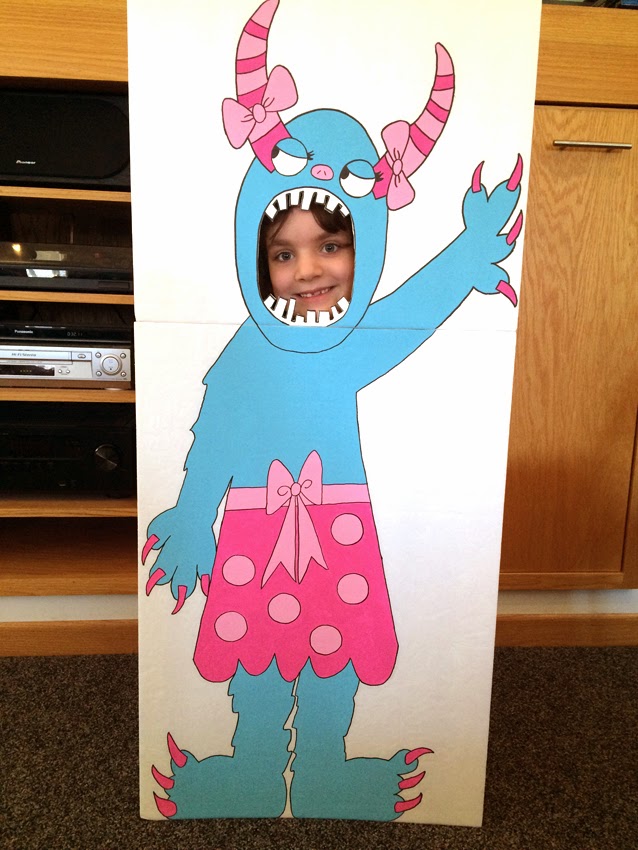
The decoration that took up the most time was a child-sized monster cut-out I tweaked from the BHG website. Since I didn't want to pay for a full color print of the monster I decided I would draw and paint my own. Now mind you, I'm *NOT* an artist so my first step was to draw a one inch by one inch grid on my foam-core boards. (I needed one and half boards in order to make the mouth opening right at E's face height.) When that was finished I opened my monster image in Photoshop and turned on the grid lines so I could begin drawing.


Here it is in the painting stage. Thankfully the blue covered really well and I only needed one coat. The light pink covered great too but the dark pink needed two coats.

I used a black Sharpie to outline everything and an Exacto knife to cut out the mouth. When it was finished I used packing tape on the pack to attach the head to the body and the triangular pieces so it would stand. I also taped two long, thin sticks on the back to keep the separate top piece from flopping forward.
.jpg)
Here is the birthday girl enjoying all of Momma's hard work:

Big sister got in on the fun as well:
For the tables I made centerpieces using some cute monsters from two books that both of our girls have enjoyed over the years; Grumpy Frumpy, Happy Snappy and One Oogly Eye. I photographed the monsters I liked, imported them into Photoshop, and recreated them digitally. I attached them and a number 3 to lollipop sticks and stuck them in a styrofoam block surrounded by a feather boa. I wish I had time to cut the monsters out properly but unfortunately I didn't. We used three of the girls Yo Gabba Gabba beanies and I made rainbow pom-pom monsters. I also purchased some cute monster flannel fabric from JoAnn Fabric and used it as tablecloths.

Awhile back, probably around Halloween a few years ago, I found these monster vinyl stickers. The only problem with them is that they weren't precut or anything. It was just one solid sheet of vinyl with 10 monsters printed on it. It didn't take me too long to cut them all out and they looked great on the windows.

Lastly, I made monster feet and a visor for each of the girls. The feet are made from 9"x12" glitter foam sheets and the visors are foam with faux fur and googly eyes. (It's hard to see in the photo that there's an opening for the kids to slip their feet into the monster ones.)

Well that's it for the decorations portion. I'll be back with another installment showcasing the food, cake, gifts, and treat bags.
Have a great night!
I love the DIY attitude of your posts. You're like The Clash of moms.
ReplyDelete